What is WordPress Theme
Themes determines how your website will be presented across different mediums. By default, every WordPress installation comes with a Twenty Sixteen theme installed and activated. There are lots of free and paid theme out there that lets you choose how your website will look to the end user. If you want to change your existing theme and install a new WordPress theme, there are 3 ways you can do that:
Installing WordPress Theme
- Using WordPress Dashboard
- Using FTP
- Using cPanel
In this article we will see how we can install and activate WordPress theme using all 3 methods.
1. Installing WordPress Theme Using WordPress Dashboard

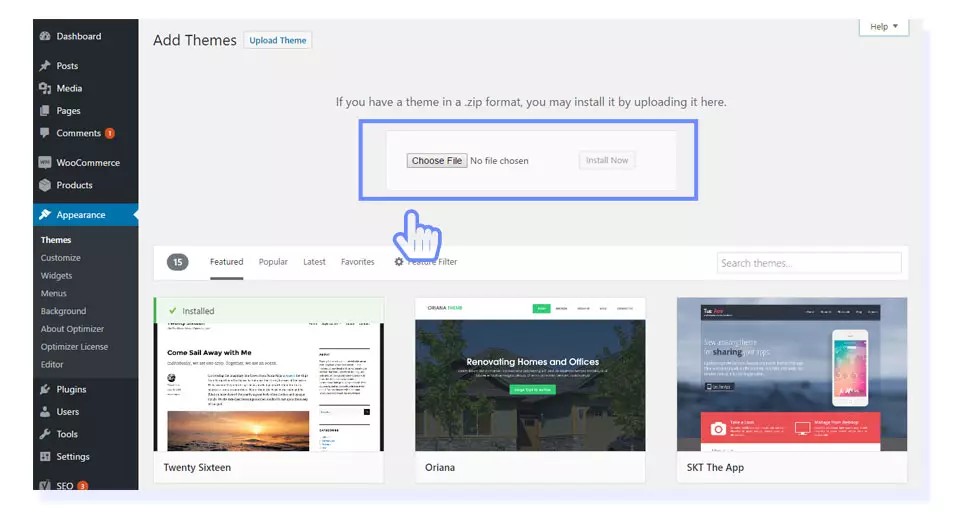
We will see how to install a WordPress theme manually without using ftp. It is one of the easiest way to install a WordPress theme. Before installing make sure you are logged in to your site. If not type www.yoursitename/wp-login.php in your browser and login.
- Go to Appearance -> Themes
- From the top, click on “Add New”
- Now click on “Upload Theme”
- Then click on “Choose File” and locate the theme file (.zip) you downloaded.
- Click on “Install Now”
- If your installation is successful, you will see “Theme installed successfully.”
- Now click on “Activate” to activate your theme.
2. Installing WordPress Theme using FTP
To install a WordPress Theme via FTP, follow these steps:
You can use FileZilla, Adobe Dreamweaver, CuteFTP or any other FTP client. We will be using Filezilla in this tutorial.
- Open Filezilla
- Enter the FTP account details provided by your web host in Host, Username & Password field
Host: Server hostname (FTP.yourdomain.com)
Username: Your Username
Password: Your Password
- Once connected, you’ll see two panes.
Left Pane (Local Site): Shows the files on your computer
Right Pane (Remote Site): Shows the files currently on the web server.
- Locate your root folder (Ex: public_html)
- Extract the theme file; drag & drop the unzipped theme folder to wp-content/themes directory.
- If you’re done uploading files, to disconnect just click the disconnect icon
- Activate the theme from Appearance -> Themes
3. Installing WordPress Theme Using cPanel
Another way of installing WordPress theme is uploading the theme using cPanel file manager. To do that you have to make sure your web host offers cPanel access. Now let’s get started
- Login to your web host cPanel using your host provided credentials
- Click on “File Manager”
- Select “Document Root for:” from the Directory Selection and click on Go.
- Now navigate to your theme directory
If your WordPress is installed in the document root folder of your web server you would navigate to “public_html/wp-content/themes“
if you have WordPress installed in a sub-folder called wordpress, you would navigate to “public_html/wordpress/wp-content/themes“.
- Upload your uncompressed theme file to the themes folder.
- After successfully uploading the theme navigate your WordPress dashboard
- Now navigate to Appearance -> Themes to activate your theme.
Common WordPress Theme Installation Errors:
During installing a WordPress theme you may face some issues. Here is some of the common WordPress theme installation errors and their fix.
- Error: Are You Sure You Want to Do This? (Solution)
- Error: The uploaded file exceeds the upload_max_filesize directive in php.ini (Solution)
- Error: The package could not be installed. The theme is missing the style.css stylesheet. (Solution)
- Error: The parent theme could not be found. (Solution)
- Error: Can’t find install theme button. (Solution)


 Copyright © 2020 AmpleByte Studio.