Imagine the following scenario: You are running a WordPress website. Everything is fine, you put in a decent amount of hours every week, traffic is growing and your site is neatly buzzing along.
Then, from one moment to the next, everything changes. For one reason or another, your site crashes. Nothing works anymore, the website is offline, nobody can reach it and you can’t log in.
Maybe something went wrong on the server, maybe the database got corrupted, you accidentally deleted an important file or somebody hacked you.
Whatever the reason, your site is history and you have no way of bringing it back. All the work, money, effort and sweat you invested is no longer there.
Now imagine yourself in one of these two situations:
- You have a full and recent backup of your site in a secure location ready to be brought online.
- You have no backup whatsoever, your host doesn’t offer any backup solutions either and your only option is to somehow fix the existing (crashed) site.
Which do you think would make your pulse and blood pressure skyrocket faster? Yeah, us too.
Performing regular backups is one of the most important tasks for anyone owning a WordPress website.
Failing to put some sort of system in place that guarantees you have an up-to-date and complete backup of your website at all times is a good way give yourself a heart attack later down the line.
Therefore, in the interest of your physical and mental health, this article will show you how to properly back up WordPress.
We will talk about what a complete WordPress backup consists of, how to manually back up your WordPress website, show you how to do the same thing with a free plugin and finally present you with a few more solutions to always keep a copy of your site around.
This is a lot of ground to cover so we better dive right in.
What is a Complete WordPress Backup?
Before we show you how to perform a WordPress backup, let’s first have a look at what we mean when we talk about backing up WordPress. What exactly do we need to save in order to to be able to recover our site later?
The WordPress File System
You might not be aware of it but every WordPress website consists of two parts: the file system and the database.
The file system is what you see when you dial into your server via FTP. First and foremost, it contains the important core files that make WordPress work.
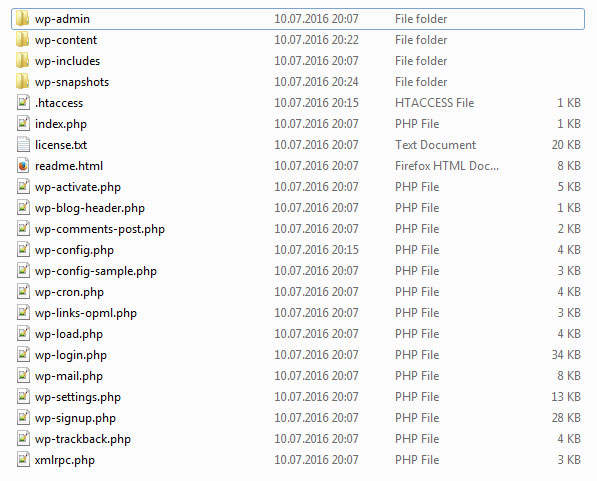
For example, in the root directory, you can find important configuration files like wp-config.php which connects your site to its database (more on that later) and also index.php which browsers use to start rendering your website.
Then we have two folders named wp-admin and wp-includes. In the first one, you can find most of the files that make the WordPress backend work and provide all functionality in the dashboard. They also contain the images, JavaScript and CSS files to make it look good.
On the other hand, the files inside wp-includes contain many of the main functions, fonts, widgets and more that make WordPress websites.
In addition to that, the WordPress file system also holds everything that makes your site your site, namely in the wp-content directory.
Here, WordPress saves plugins and themes which determine the design and functionality of your site, but also the uploads folder that contains all images and other media you have uploaded.
Finally, the main folder houses a number of system files that are important to run your site on a server such as .htaccess which enables WordPress to use pretty permalinks.
Sounds important, right? However, you might be surprised to hear that almost anything on your server can be lost or replaced without it being a big deal. In fact, the WordPress core files change with every core update and it’s no problem at all.
The exception to this is wp-content. Anything inside that folder is very “personal” and unique to your site and thus can not be replaced as easily. For that reason it is also the most important part to save when backing up.
The WordPress Database
While most people would consider “their website” to be what’s on their server, quite the opposite is true. The second part of a WordPress website – the database – is by far the more important.
While it’s theoretically possible to get your website back on track if all you have is the database
(even if it’s a hassle to put the images and plugins back in place), the opposite is not true.
If the database is gone without a way to get it back, you have essentially lost your site.
That’s because the WordPress file system is merely a gateway to communicate with the database. The latter holds all your important content such as posts, pages, widgets and really makes up the core of your site.
So, if the database vanishes or becomes unusable, all of that is basically lost unless you have a backup or saved your content in another form somewhere else.
Scary, right? But that’s exactly why it’s so important to learn how to back up WordPress, something we will get to now.
How to Back Up WordPress Manually
In order to avoid the worst case scenario, one of the most essential skills is knowing how to back up your site manually.
Being able to make a copy of your site by hand really comes in handy it is down and you want to create a backup before troubleshooting the problem (in case you break something).
So let’s talk about that first.
Download Your Site Files
As mentioned above, every WordPress website consists of two parts: its files and the corresponding database. To manually back up WordPress, the first thing we do is download the files.
For that, you need to access your server via an FTP client such as FileZilla. Alternatively, many hosts also provide access to your file system via cPanel or other administration tools.
Whichever you choose, make sure to enter the root directory of your site, mark all files and folders in there and move them to a location on your hard drive. This will start the download process.
In some cases it might also make sense to activate force showing hidden files from the options menu in order to download .htaccess and other system files, especially if you have custom code in there.
In any case, depending on the size of your site and the number of images and plugins, the download might take a while. Get yourself some coffee or move on to the database – your choice.
Download the WordPress Database
Next, we will save the WordPress database. Most hosting providers will provide some sort of admin platform to access and manage it and you need to figure out how your host handles this.
A very common solution is phpMyAdmin, which is what we will use for our example. You might already be familiar with this program from when you set up your database to install WordPress.
First, you need to log in to your database administration portal and find your database. If you are using phpMyAdmin, all available databases are listed on the left side.
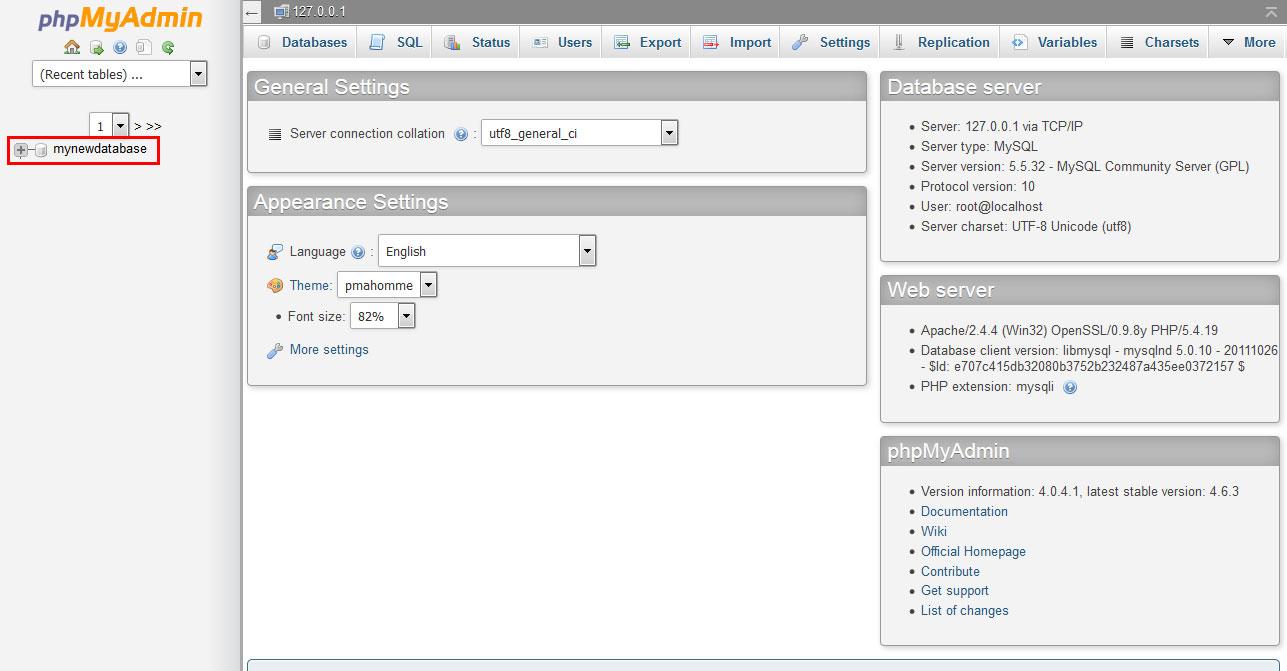
Click on the name of the one you want to back up. If you don’t know which one it is, you can find that out by looking inside the wp-config.php file of your WordPress installation.
Next, find Export at the top of the screen. Choose Custom for export method to access additional options, then configure as follows:
- Check that all tables are marked for export (unless you have several databases with different prefixes in there or another reason to exclude tables)
- Select an output name and compression (we recommend Gzip as it makes the database faster to download and upload)
- Ensure to select SQL for format and that you export both structure and data
- Finally, check the following under Object creation options:
- ‘Add DROP TABLE / VIEW / PROCEDURE / FUNCTION / EVENT statement’
- ‘IF NOT EXISTS’
- ‘AUTO_INCREMENT’
- ‘Enclose table and column names with backquotes’
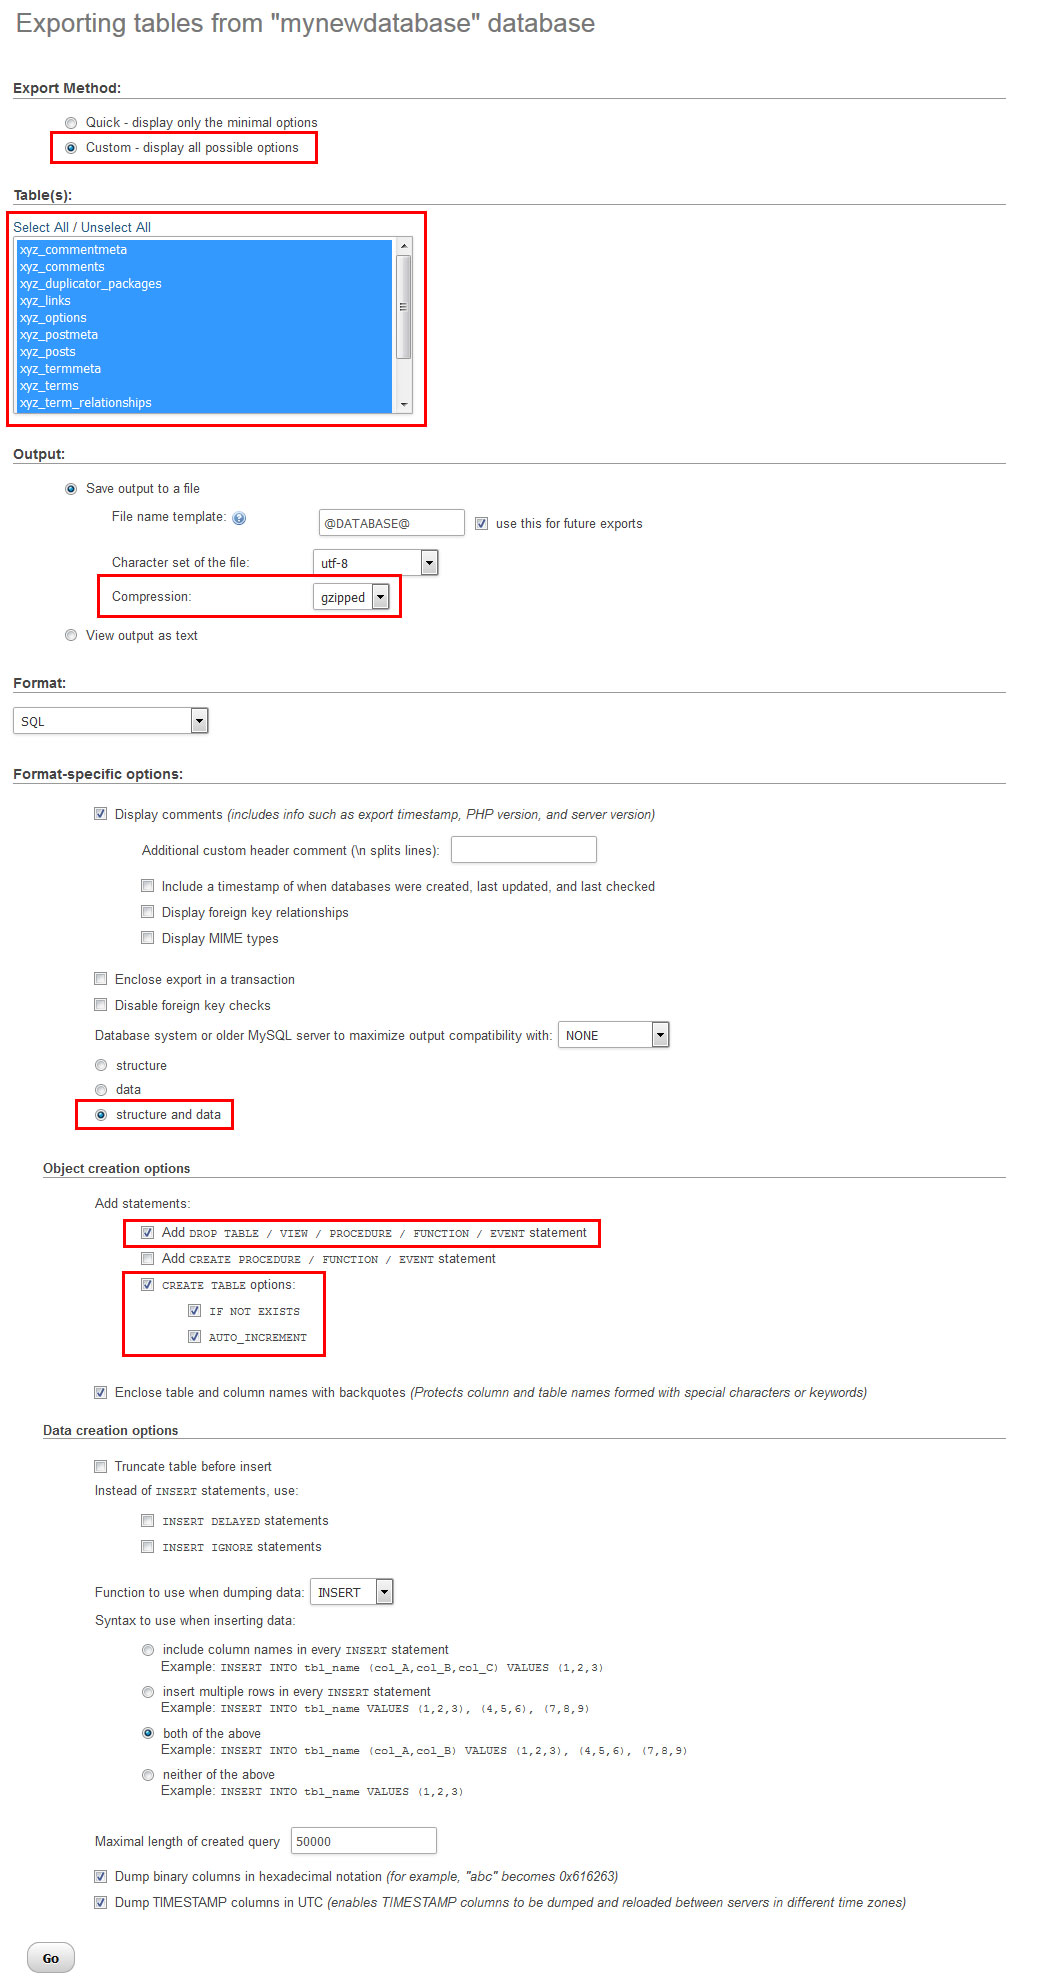
When you now hit Go at the bottom of the screen, you should soon be prompted with a file download. This is your database. Save it and wait until the download is finished.
Once both your files and database are successfully located on your computer, the manual backup is complete. Now all that’s left is storing them in a secure location in case you need to restore WordPress manually later on.
How to Back Up WordPress with UpDraftPlus
Alright, now that we know how to back up WordPress manually, let’s go through the same process with UpDraftPlus, one of the leading WordPress backup plugins.
Why UpDraftPlus?
The plugin is by far one the most popular solutions to back up WordPress and has more than 800,000 active installs.
UpDraftPlus has the ability to schedule automatic backups, can restore from backup with one click, split large sites into multiple archives and more.
It’s biggest plus, however, is that even the free version lets you back up your site to remote locations such as Dropbox, FTP and Email. Most other plugins only offer this featured with premium addons.
Yet, is this absolutely necessary? Well, saving backups on the server is better than nothing, however, if your server goes down along with your site, the backups are also gone. Therefore, remote backups are clearly the better idea.
Install the Plugin
The installation of UpDraftPlugs follows the usual process: Go to Plugins > Add New, type ‘Updraftplus’ into the search bar and hit enter. Find the plugin in the list and click Install Now to start the installation. Once that is done, click Activate Plugin. That’s it.
Perform a Backup
You next step is to find the options for UpdraftPlus under Settings > UpdraftPlus Backups.
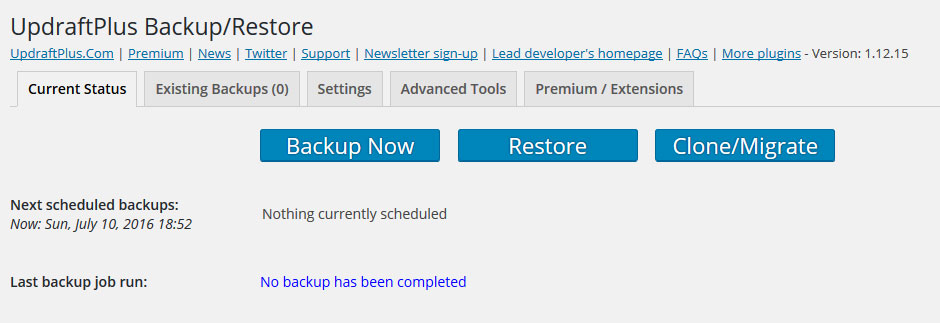
From here, you can back up and restore, see the backup status of your site and existing backups as well as configure all settings. You also have the option to buy the premium version or paid add-ons.
For the beginning, all we want to do is perform a normal backup. For that, we need to hit the big Backup Now button on the first tab.
This will open a new window where you can choose whether to back up the database, files or both. It will also warn you that the backup won’t be sent to a remote storage since you haven’t set one up yet.
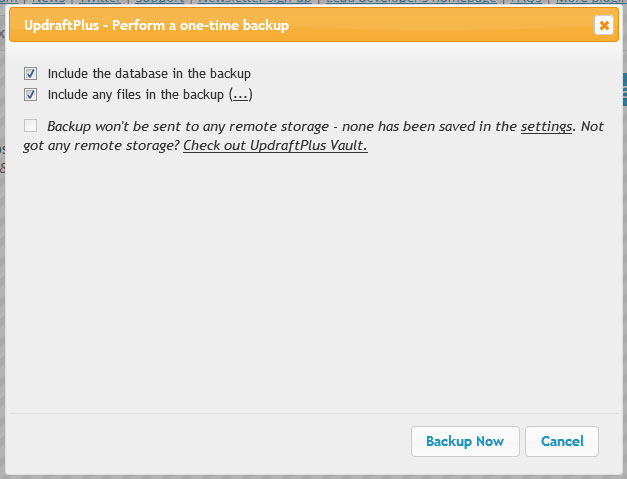
Proceed by clicking Backup Now at the bottom. The backup will start and you will see a progress bar. Lean back and relax, there’s nothing for you to do at the moment.
Once done, the new backup will appear in the Existing Backups tab.
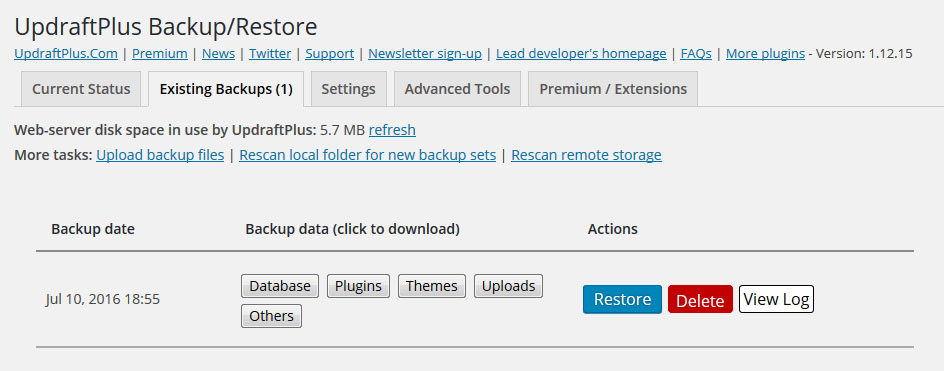
As you can see, it is saved in several parts: Database, plugins, themes, uploads and other. This allows you to download each part on its own if needed.
You should also notice that the backup doesn’t include WordPress core files.
As mentioned earlier, these can always be downloaded with a fresh WordPress version and UpdraftPlus refrains from saving them in order to save space.
Finally, from this screen you have the option to restore or delete your backup and view its log file.
So far so good. However, in order to be really protected from harm, we want to set up a regular backup schedule and send the saved files to a remote location.
Create a Backup Schedule
In the plugin settings you can set up how often your files and database should be backed up automatically. All you need to do is use the drop-down menus to pick your preferred schedule. This can be every couple of hours, daily, weekly or monthly.

On the right, you may also choose the number of backups the plugin should keep so you are able to go back several versions if necessary.
However, how often should you back up? Well, it depends on your site and you need to make that decision depending on your own situation.
If you have a very busy website that is updated often and receives a lot of comments, a shorter interval makes a lot of sense.On the other hand, for a blog that only sees a new article once a week and doesn’t get a lot of user interaction, a weekly backup might be enough.
Below the schedule section, you can choose from a number of remote services to save backups to.
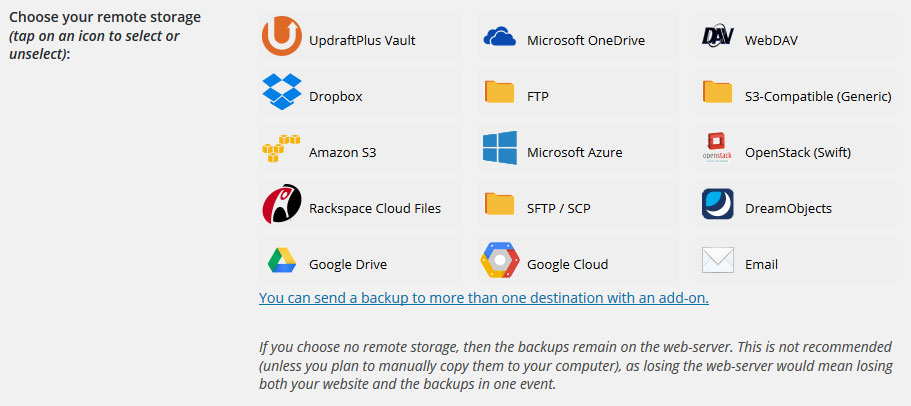
It is highly recommended that you take advantage of this feature since many of the services can be used for free. Pick whichever suits you best and follow the on-screen instructions on how to connect it to your site.
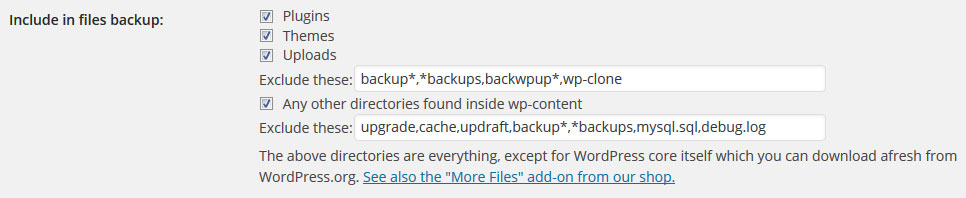
The rest of the settings can usually stay as they are, unless you want to exclude specific files and directories from being backed up. UpdraftPlus itself already does so with a number of directories that contain their own backup files.
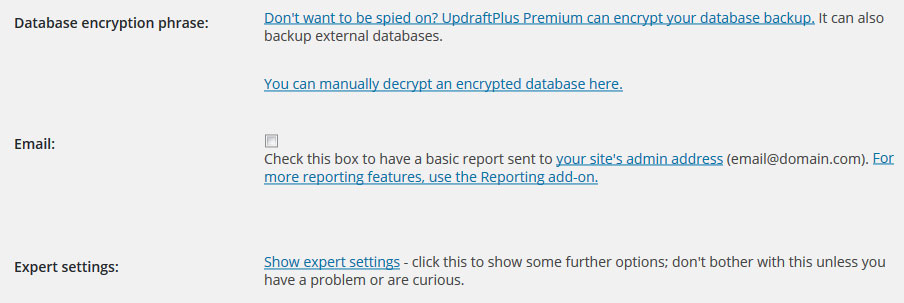
Further below, you have the option to receive a report via email whenever a backup performed. In the expert settings you can also enable debug mode, set the size at which to split archives, whether to keep an additional local copy of remotely saved files, the server directory to save backups to and SSL settings.
In most cases there’s no need to make changes here. When you are done with the configuration, click Save Changes at the bottom and your automatic backup schedule is set up.
Congrats, your site security has just been improved significantly!
Other Backup Solutions for WordPress
While it’s one of the more popular ones, UpdraftPlus is not the only backup plugin for WordPress out there. Users can also choose from several other high-quality options to back up their WordPress websites.
Duplicator
We already talked about this plugin in our article on how to clone a WordPress website .
It’s a great tool to easily create an archive of your entire site and download it to your computer. It’s also one of the easiest to use out there.
However, to be able to use remote storage and scheduled backups users need to buy the pro version which costs between $39 and $119 per year depending on how many sites you want to use it on.
BackWPup
Another solution that offers cloud backups even in the free version. Apart from creating a backup schedule, BackWPup can also repair and optimize your database and will inform you about backups via email. The plugin’s Pro version offers additional features for $75 to $190.
BackupWordPress

The solution by Human Made enables you to create different backup schedules for your database and file system, however, the free version does not offer any cloud storage.
This feature is reserved for the developer version ($99). However, BackupWordPress will email your backup files to you if you wish.
BackupBuddy (premium)
The only premium-only plugin on this list, BackupBuddy is made by iThemes, one of the leading companies in the WordPress industry. The plugin can back up your files and database as well as clone websites and move them to another server.
This backup solution supports a number of cloud services including Amazon, Dropbox, FTP and others. It costs between $80 and $150 per year and has an option for purchasing a one-time lifetime license for $297.
Summing Up
Losing your WordPress website is one of the worst things that can happen. The only thing worse than that is to lose your site with no way to bring it back.
For that reason, knowing how to back up WordPress is one of the most essential skills of anyone working with the platform.
Above you have learned what exactly comprises a WordPress backup and the parts that make up a WordPress site. You now also know how to save both site components manually and create a full backup.
Plugin solutions make saving your website much more convenient and we have introduced you to several such solutions. Yet, if for some reason using them is not an option, knowing the manual route can be a real lifesaver.
Hopefully, this tutorial has given you the final nudge you needed to put a backup solution for your site in place. We hope even more that you will never need it.
Which method do you use to back up WordPress? Anything to add to the above? We would love to hear from you in the comments section!


Very useful information. but i will like to add the following.
on WampServer all you need to do is to extract the wordpress file into www folder, create a mysql database named wordpress and you are good to go. wampserver is easier to operate you can download wampserver at https://sourceforge.net/projects/wampserver/files/latest/download?source=files (64bit)