WordPress has become one of the most popular website building tools of recent years which is loved by millions of people worldwide. Installing WordPress on your webhost takes only a few minutes. After you are done with getting your domain and hosting, installing WordPress takes only a few minutes. There are few ways of installing WordPress in your host. Both the installation methods we described below works on popular WordPress host like Bluehost, Godaddy and hostgator. So let’s take a look how to install WordPress in this step by step guide.
- Installing WordPress automatically from your Hosting Control Panel
- Installing WordPress Manually through FTP
1. Installing WordPress automatically from your Hosting Control Panel
Most Popular web hosts come with a php application installer that lets you install WordPress within minutes with few simple steps. If your host has cPanel, it probably comes with php application installer called “Softaculous“. Softaculous auto-installer allows the installation of web applications with the click of a button. A wide variety of applications are available to be easily installed, including web portals, e-commerce solutions, content management systems, blogs, polls, forums and more. Softaculous can take over the installations of other auto-installers. Softaculous also has an easy-to-use backup feature, allowing for the backup of installations at anytime. For this tutorial we have selected the Siteground hosting plan that ships with Softaculous. Since Bluehost, Inmotion hosting, Namecheap and other popular webhost comes with Softaculous this method works with them well. So in this tutorial we are going to take a look on how to install WordPress with Softaculous without breaking a sweat.
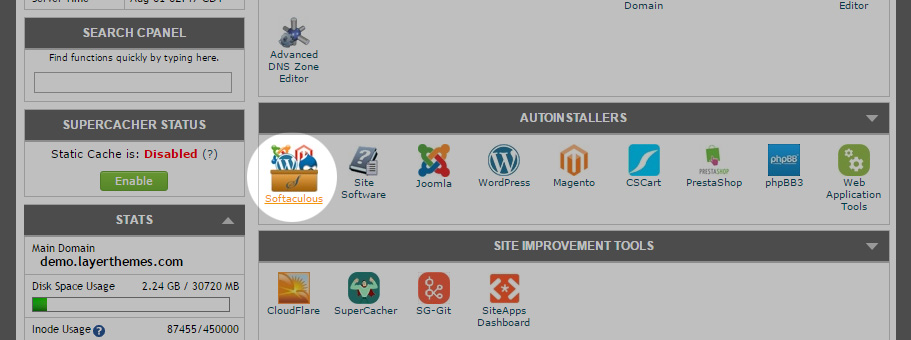
Step 1: Go to your cPanel and scroll down to “Auto Installers” area and click the “Softaculous” button.
Step 2: From the Softaculous Installer screen, click the “WordPress” tab.
Step 3: Now from the WordPress installer page, click the “Install” button.
Step 4: In the next screen, you will need to provide details on where to setup your domain and details about your WordPress.
- Software Setup: From this section keep the “Choose Protocol” setting “http” unchanged. If you want to use SSL domain select the https:// option. Select your domain name from the “Choose domain” option. Now if you want to install WordPress on your main domain, keep the “Directory” field empty. If however, you want to install WordPress inside a subpage like http://yoursite.com/wordpress/ write “wordpress” in small letters.
- Site Settings: In this section we will add in our Site’s name and a one line description.
- Admin account: From this section you will set your username and password. After the installation process, you will have to login to your WordPress website with this login info to manage your website. Make sure to change the Admin email address. Its where all of your WordPress related notifications will be sent to.
- Choose Language: Keep the language settings to English if you don’t want your WordPress in any other language.
- Select Plugins: You can install the “Limit Login” plugin to keep brute force attacks on your website sites in check. Select this option to secure your WordPress.
- Choose Theme: Keep the Choose theme option to “None”.
Step 5: Now that you are done with filling up the setup form, click the “Install” button to begin installing WordPress.
Step 6: After clicking the Install button, you will be taken to a page where you will see the installation in progress. This process takes around 2-3 minutes. After the installation is complete, you will be provided with a WordPress admin URL in the same page. An email will be also sent to your inbox which will contain details of the installation. Click the admin URL (eg: http://yoursite.com/wp-admin/) and use your WordPress admin username / password that you selected in “Step 4” to login to your WordPress admin panel.
2. How to install WordPress Manually through FTP
Installing WordPress manually takes a little more time and a very little technical knowledge. In this section we will see how we can install WordPress manually. This process works on almost any hosting. The process has 3 simple steps:
2.1. Preparing for the installation Process: Creating a Database.
2.2. Preparing for the installation Process: Uploading WordPress to your server
2.3. Starting the Installation process
2.1. Preparing for the installation Process: Creating a Database
The First of starting the WordPress Installation process is creating a database from your cPanel. This database will hold all your WordPress data inside it. Let’s get started with the process:
Step 1: Login to your cPanel.
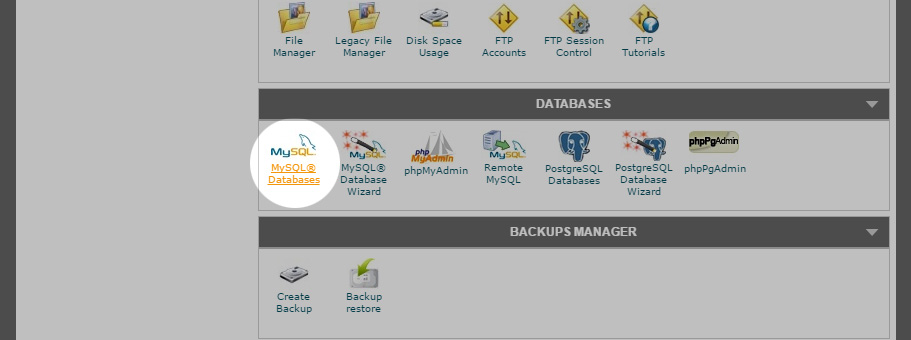
Step 2: Click the “MySQL Databases” icon.
Step 3: Now in the “Create a Database” field, write a name for your database in small caps (Eg: mysite or wordpress) and then click the “Create Database” button.
Step 4: Now that you have created a database, you need to create a user for your dataset. Without creating user for the database, your database cannot be accessible anonymously. Scroll Down and from the “Add a New User” section, fill up the username and password info. Keep this info somewhere safe so that you don’t forget it, we will need it in a step ahead.
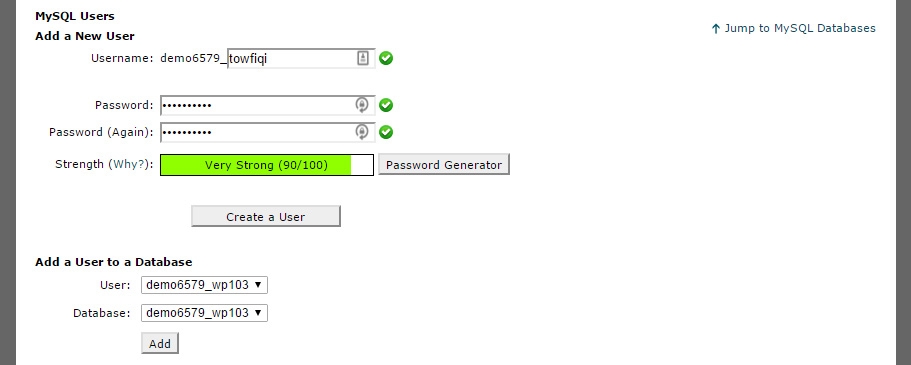
Step 5: Now that you have created the database and the MySQL user, you need to connect these two. To do that, from the “Add a User to a Database” section, select your database and the username and click the “Add” button. Your newly created MySQL user now has permission to access your MySQL database.
Now that we are done with the process of Creating the Database, let’s move on to the next step.
2.2. Preparing for the installation Process: Uploading WordPress to your server
In this step we will download WordPress and upload it to our server to start the Installation process. We will need 3 things for this process:
- Latest version of WordPress
- FileZilla FTP Software – that you will need to install in our computer.
- FTP login credentials which was emailed to you by your webhost.
Step 1: Go to https://wordpress.org/download/ and download the latest version of WordPress (a zip File). Right click on that zip file you just downloaded and extract it.
Step 2: Download the Latest version of FileZilla and install it to your computer.
Step 3: Start Filezilla and from the top left corner click the “File” menu and then select “Site manager”.
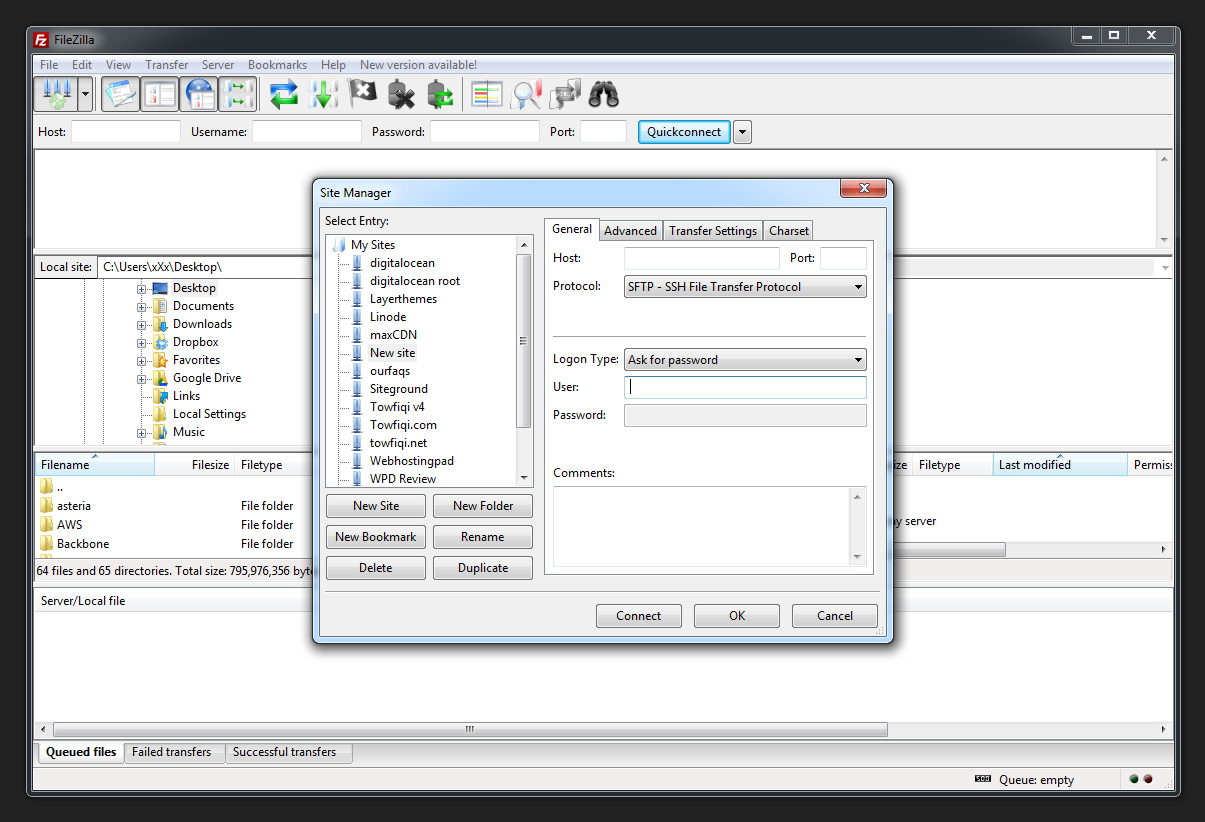
Step 4: Click the “New Site” button. After clicking that button you will see some fields on the right panel.
Step 5: From the Right panel, fill up the fields one by one using the FTP login data provided by your webhost. After filling up the login details click the “Connect” button.
Step 6: Once you are logged in, on the right panel of FileZilla, you will see all the content of your server. Double click on the “public_html” folder to get inside that folder. In some hosts this folder named as “www” or “html”.
Step 7: Once you are inside, from the left panel find the WordPress folder that you extracted earlier and double click it enter that folder. Now select all the files and folders of that folder and right click and select the “Upload” button to start the Uploading process.
(Optional) If you would like to install your WordPress inside a sub folder to access it in a subpage like: http://yoursite.com/wordpress/ . Instead of uploading the files and folders inside the “www” or “public_html” folder, create a new directory inside the “public_html” folder by right clicking and name it “wordPress” or anything you like and double click the folder to get inside it and upload the WordPress files and folder inside it.
Step 8: Wait for the upload to finish. Once the upload process is complete, you will notice that the “Queued Files” section in the bottom panel of FileZilla is cleared.
2.3. Starting the Installation process
Once you have uploaded WordPress to your server, navigate to your website from your browser. You will be prompted with WordPress Installation screen. Let’s get started with the installation process:
Step 1: First select your preferred language from the first screen and click “Continue”.
Step 2: In the next page you will be provided a short summary of how the installation process will be conducted. Click the “Let’s Go” button.
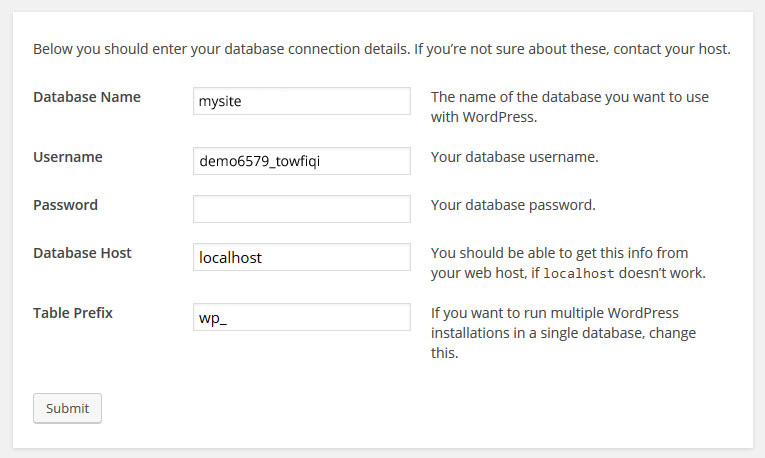
Step 3: In this step, you will be asked to fill in your Database information. In the “Database Name”, “Username” & Password field write the down the database name, MySQL username and password that we created in 2.1. In the “Database Host”, write “localhost”. Keep the “Table Prefix” field as is. Click the “Submit” button.
Step 4: From the Next Page, click the “Run the Install” button.
Step 5: In the next page you will be asked to provide your WordPress Site info. Fill in your desired WordPress Site name, administrator username and password and email address. Keep the “Search Engine Visibility” unchecked and click the “Install WordPress” button.
Step 6: Click the “Login” button to log in to your WordPress Dashboard to start building your site with WordPress.
Now that you know how to install WordPress, you can install WordPress plugins to add various functionalities on your site. You can also install WordPress themes to customize the way your site looks.


Hi , can i change directory install ? i installed to /wordpress folder 🙁
Thanks for the post Towfiq.
I am following this article and this tutorial to install WordPress https://www.youtube.com/watch?v=SnB5lkcRRhA and I see that there are different steps in the hosting and in the steps of the installation.
What am I doing wrong? Any recommendation?
Thanks for the help!