After Instagram’s policy change on June, 2020, getting user id and access token became a little harder. Here are the steps you will have to take to activate the Optimizer Instagram Widget
Step 1
Since Facebook acquired Instagram few years ago, you will now have to create a Facebook app to embed your Instagram feed. To do that Go to https://developers.facebook.com/apps/
Step 2
click the Add a new App button.
Step 3
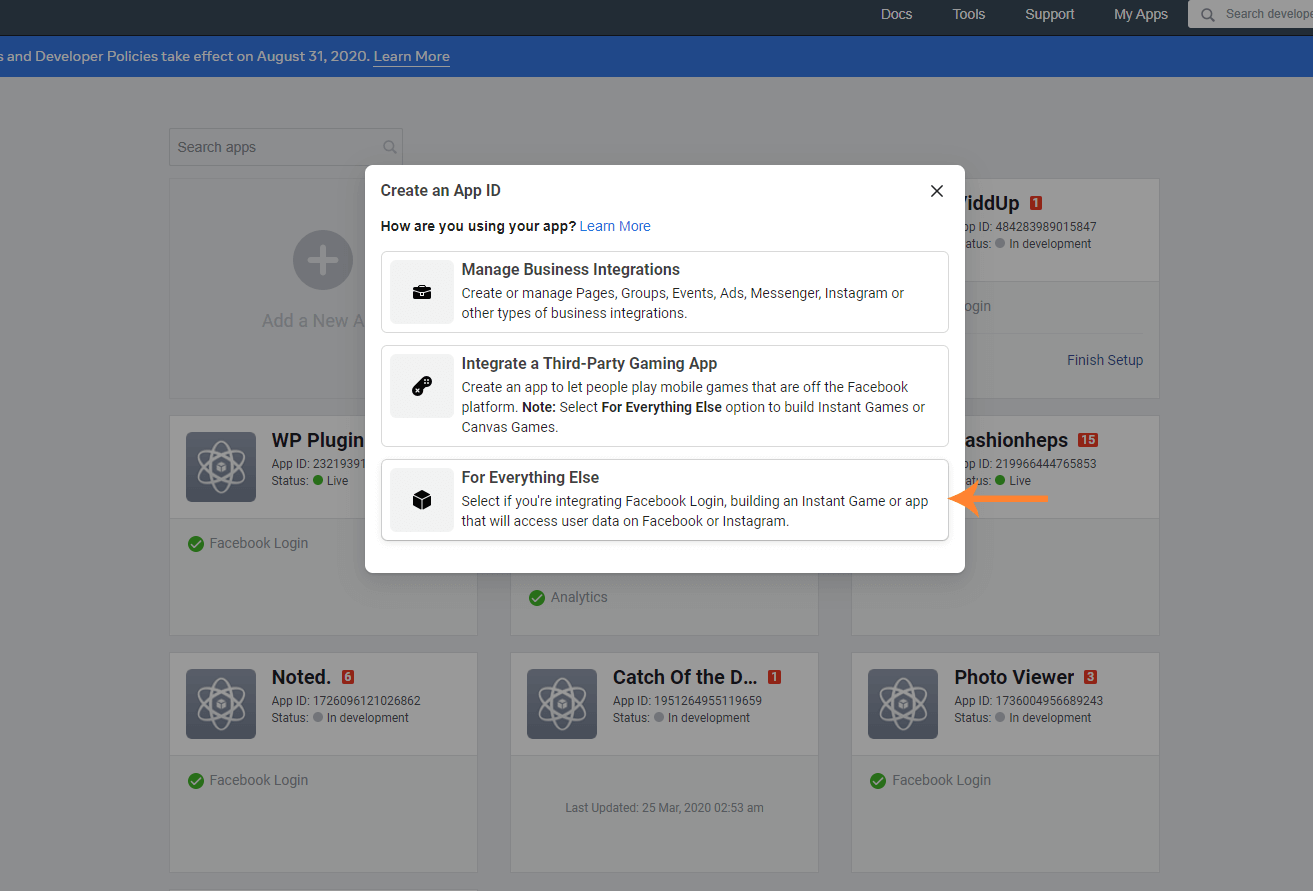
A small popup with 3 options will show up. Click the “For Everything Else” option.
Step 4
On the next screen give your App a name. For example your Mywebsite.com feed. Then insert your email address and click the Create App ID button.

Step 5
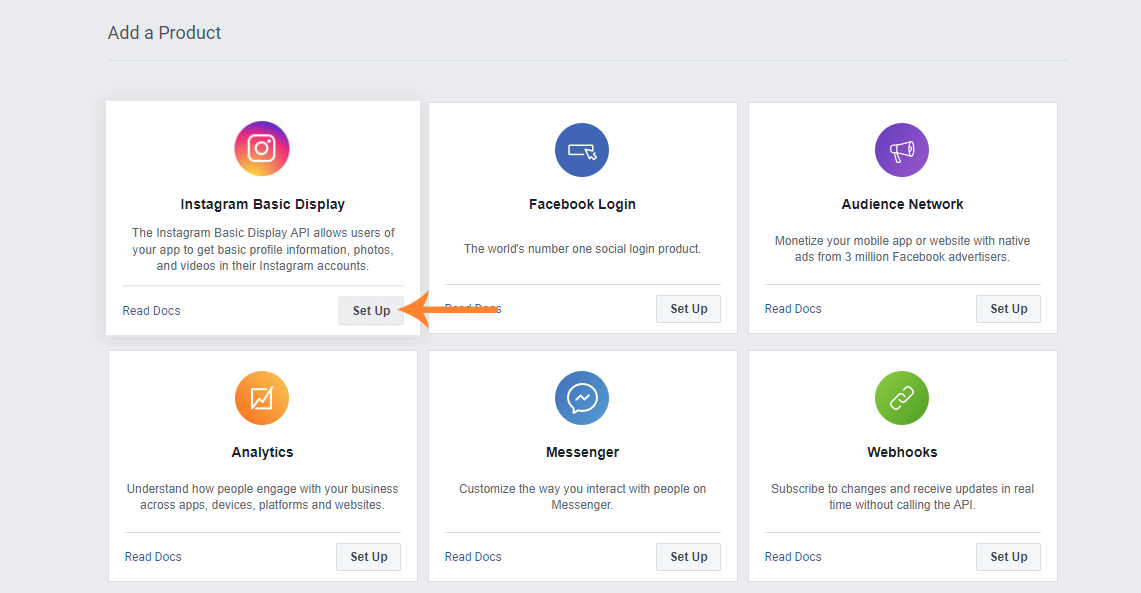
Once you have created the App, you will be redirected to the dashboard page of your App. Scroll down to the “Add a Product” section and click the Setup button inside the “Instagram Basic Display” box.
Step 6
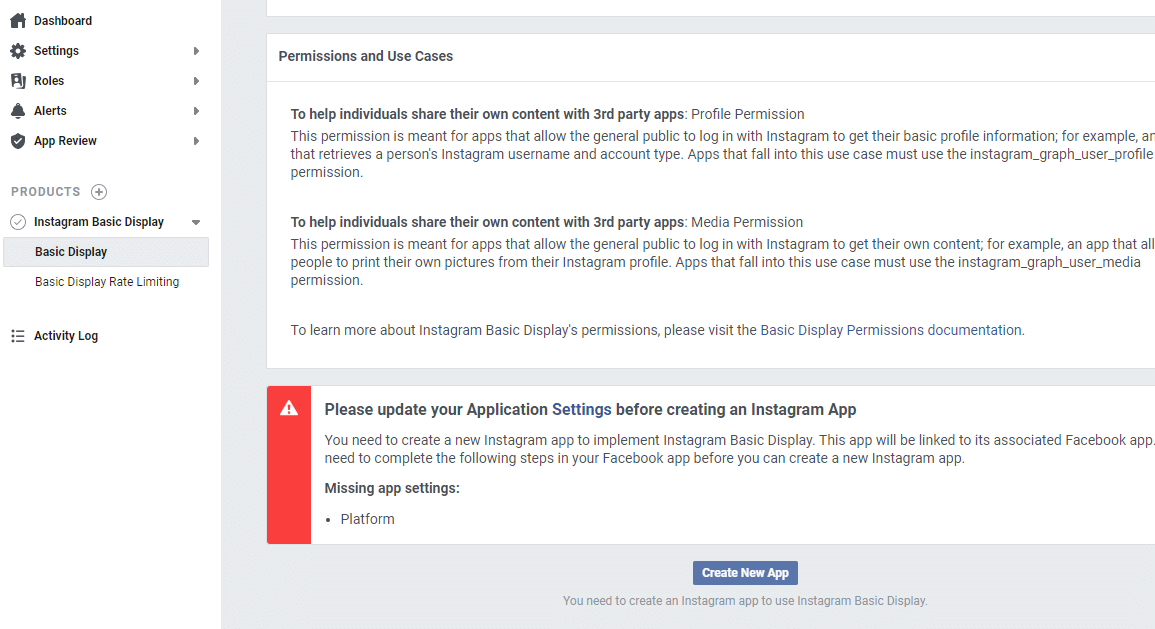
You will be taken to the terms and conditions screen. Scroll down and click the “Create New App” to integrate the Instagram Feed feature into your Facebook App ID that we created earlier.
Step 7
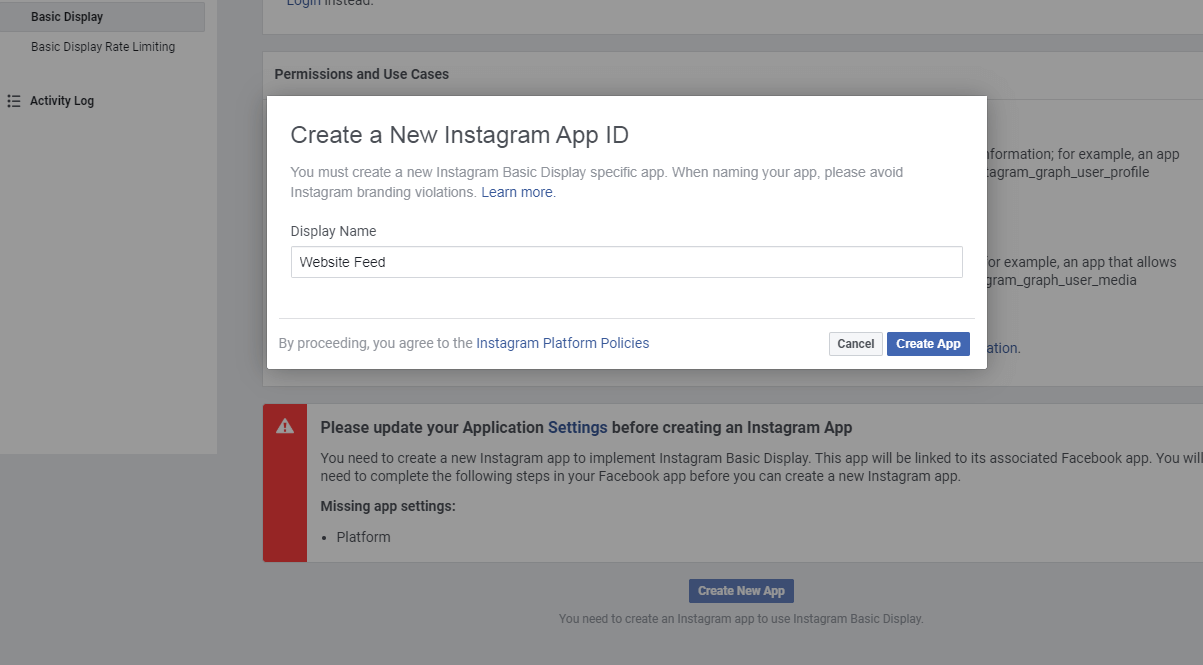
Once you click the button, a popup will appear asking you to give your Instagram app a new name. Write down a name to your liking and click the “Create App” button.
Step 8
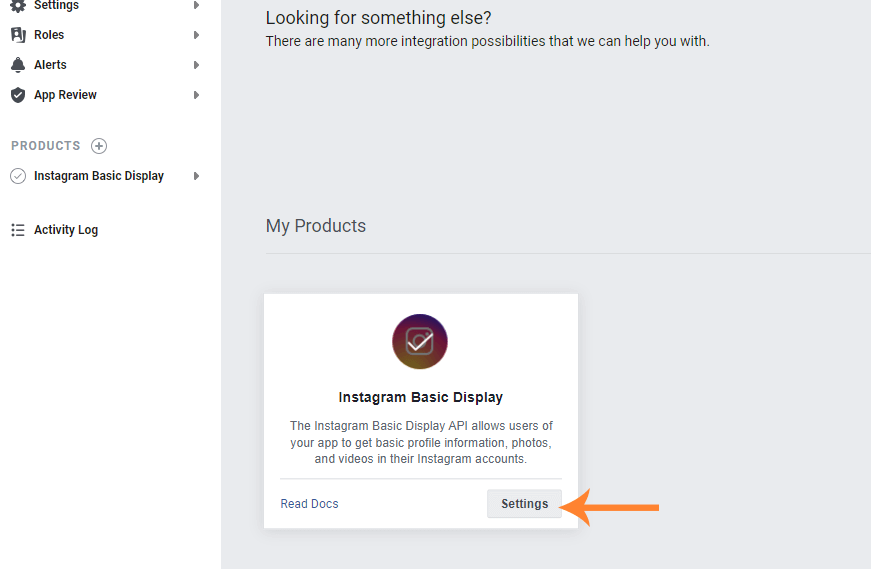
You will be redirected to the App dashboard page again. Scroll down to the very bottom to the “My Products” section and click the “Settings” button inside the “Instagram Basic Feed” box.
Step 9
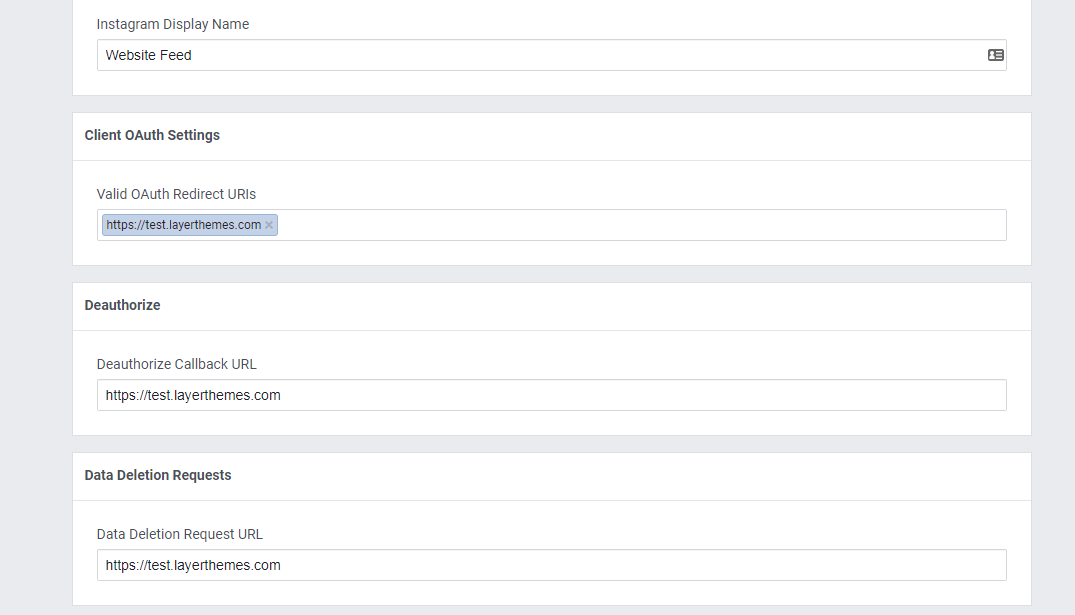
On the next page, fill up the Client OAuth Settings, Deauthorize & Data Deletion Request fields with your website address. And then click the “Save Changes” button.
Step 10
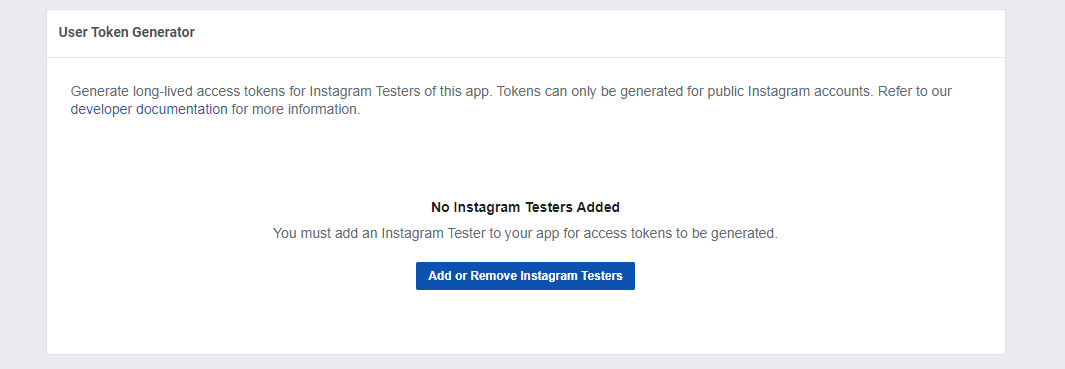
Then click the “Add or Remove Instagram Tester” button from the “User Token Generator” section.
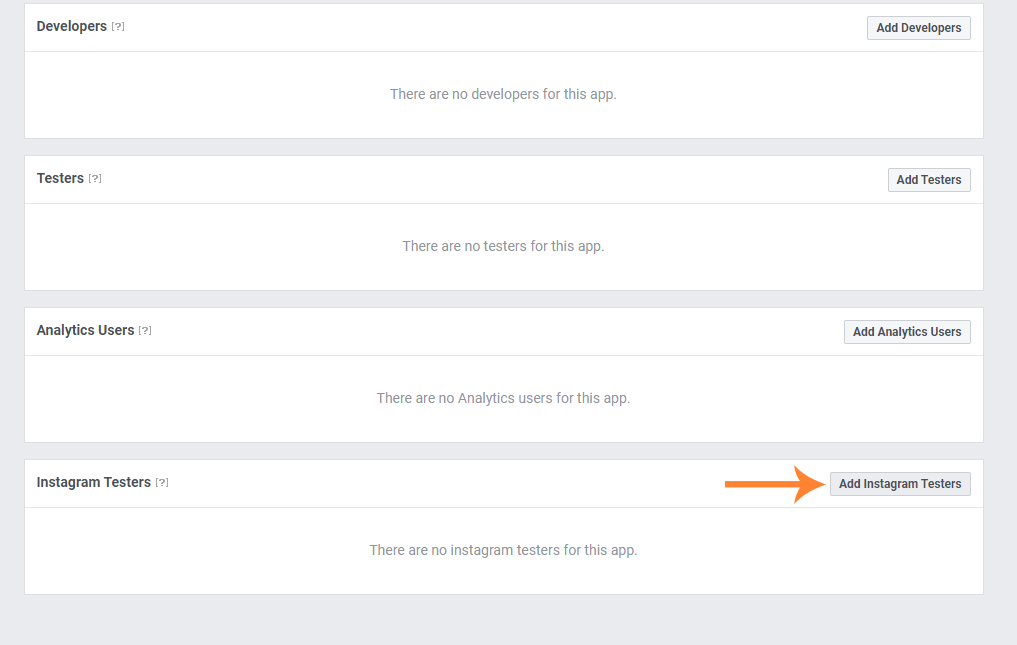
And then click the “Add Instagram Testers” button.
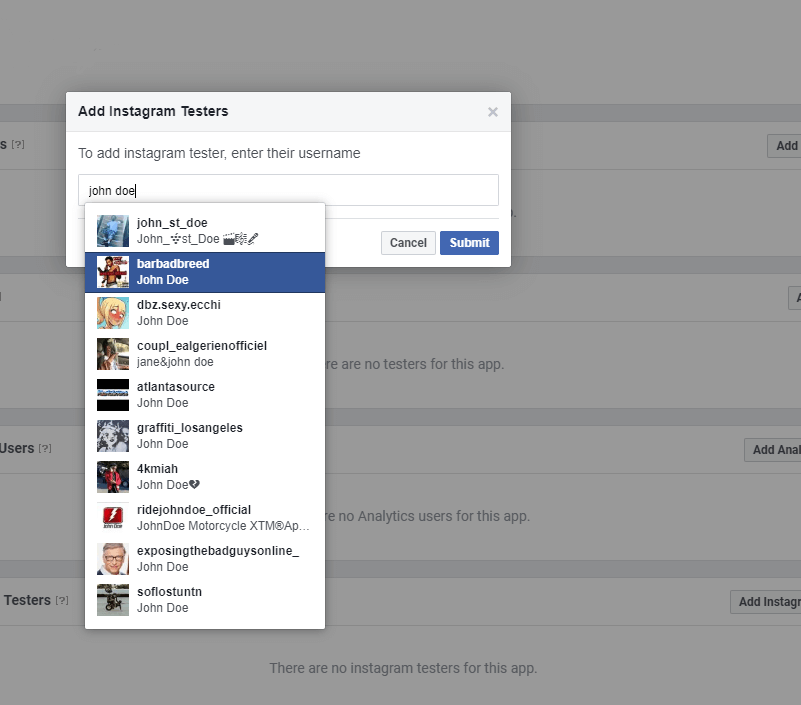
Step 11
Then search for the Instagram user account and that you want to use to pull the images from. Once selected, click the submit button. When you do that, the selected instagram account will be receive an invitation to allow displaying their Instagram feed.
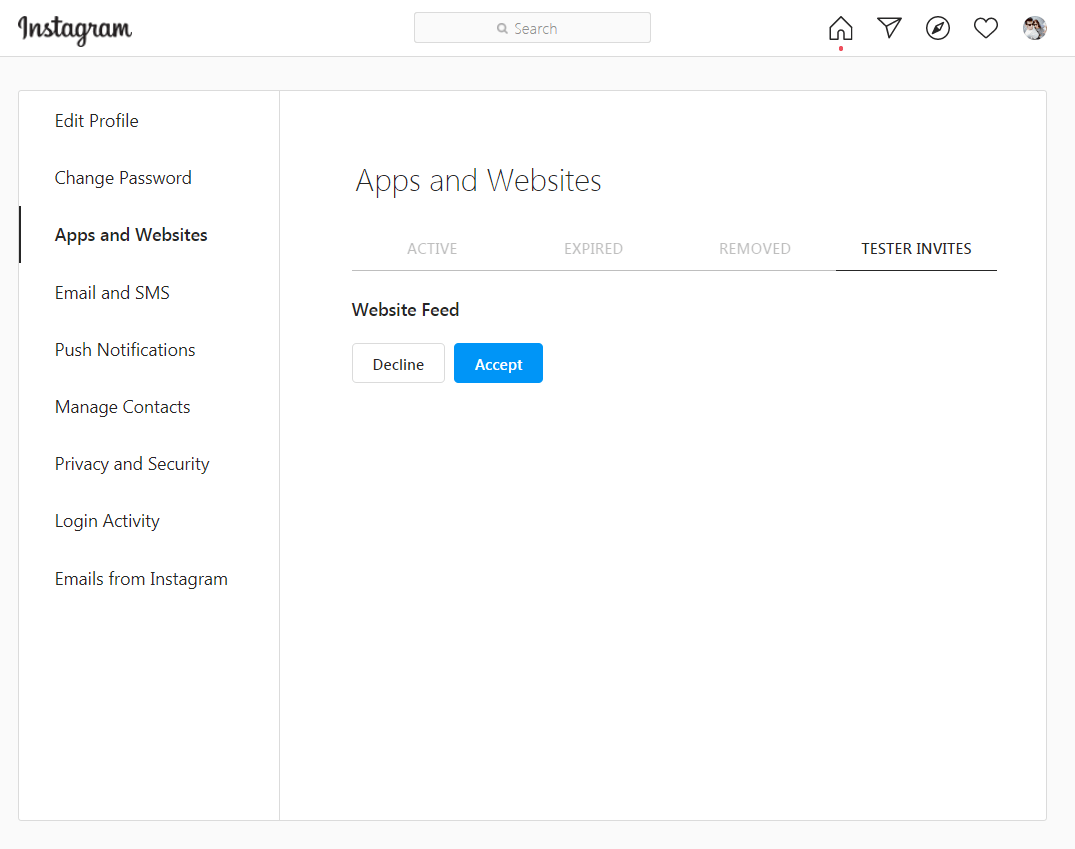
Step 12
The instagram user that you sent the invite to (whether its you or someone else) has to accept the invitation. To do that, visit this Instagram Settings page https://www.instagram.com/accounts/manage_access/ and click the “Tester Invites” button and then click the “Accept” button.
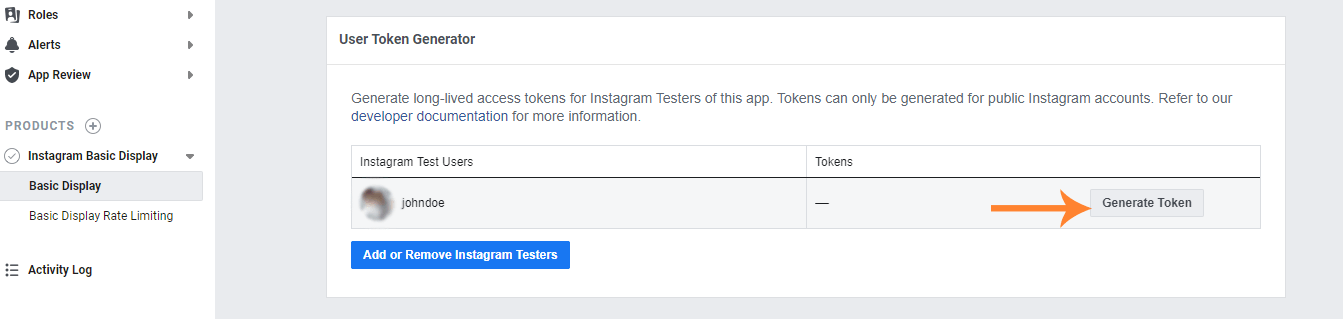
Step 13
Now that the user has accepted the invite, go back to your Facebook App dashboard and you will notice the newly appeared user inside the “User Token Generator” Box. Click the “Generate Token” button.
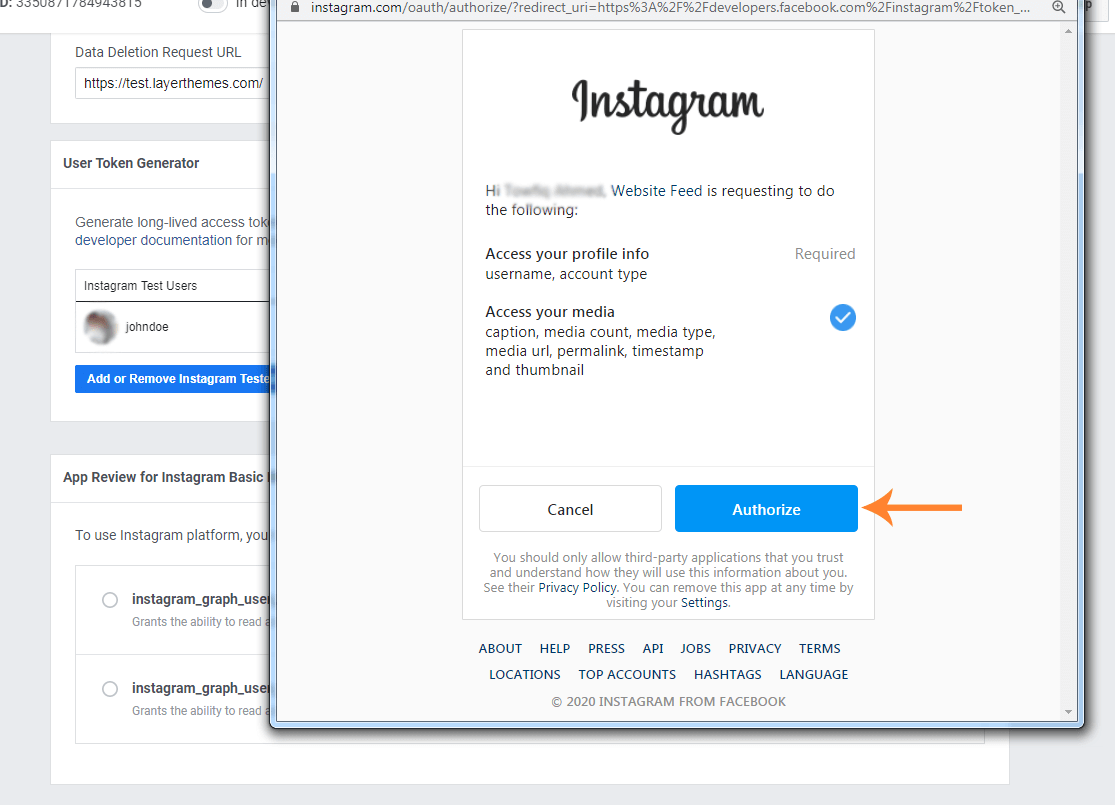
Step 14
A new popup will appear that will ask you to Authorize the integration. Click the “Authorize” button.
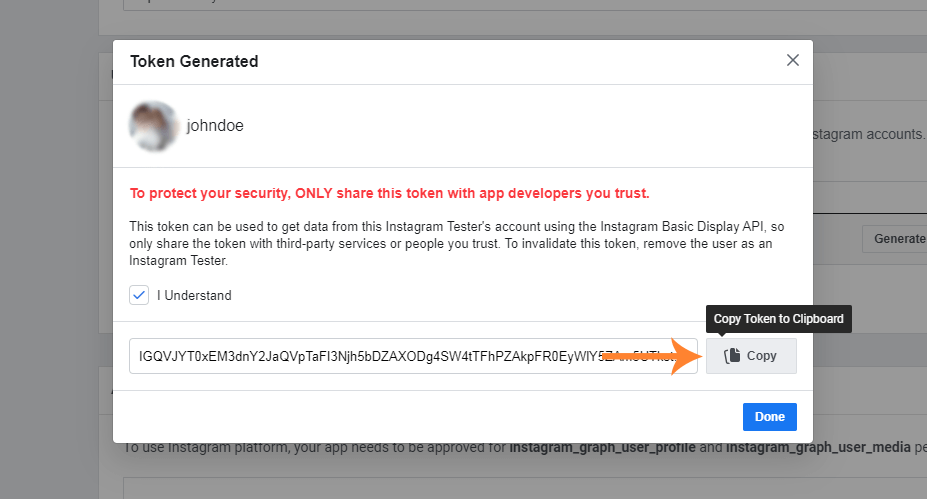
Step 15
Once its clicked, another popup will appear that will contain the Access Token. Copy the token and paste it in your Instagram Widget’s “Instagram Access Token” field.
Step 16
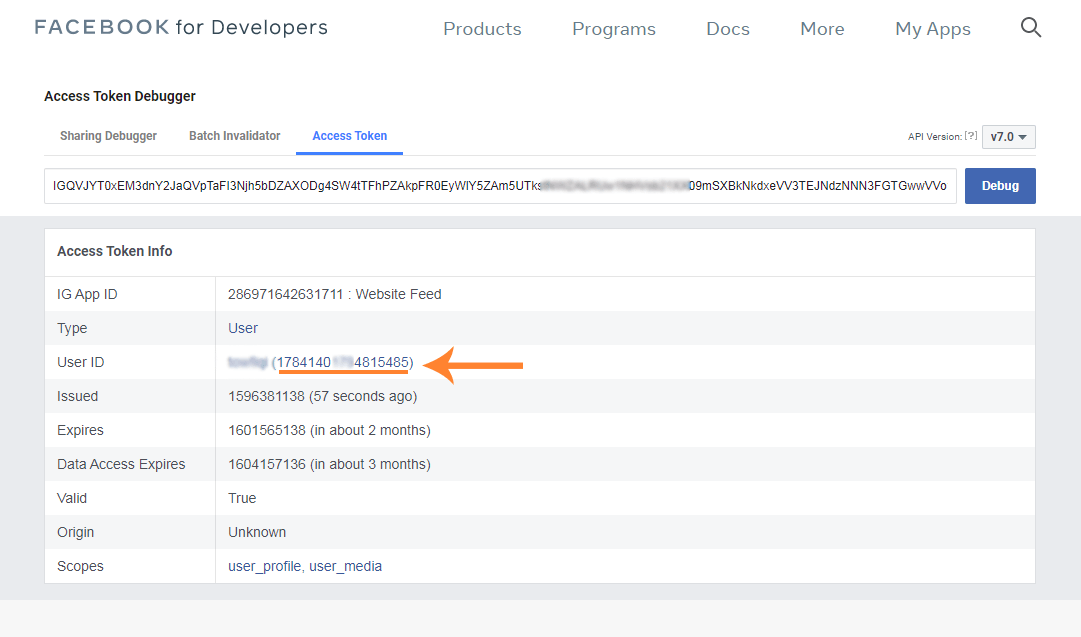
Now that we have generated the Access token, we will need to find out the Instagram User Id. To find it, go to this page: https://developers.facebook.com/tools/debug/accesstoken/and insert the Access token we just copied in the previous step and click the “Debug” button. The page will show lots of information about the Instagram App that we just created. Among the various information, you will also find the user id (number). Copy the id and paste it in your Instagram Widget’s “Instagram user id number” field. Now save your widget and your Instagram widget should work as it supposed to.
Once you have filled in both the Instagram Access Token and the Instagram user id number in your Instagram Widget Settings, click the Save button of the widget and the Instagram photos should appear.