Running a website involves a lot of guesswork. You need to guess what kind of design your visitors like and don’t like, which type of content they are interested in and how they are going to interact with it.To make matters worse, there’s no way of knowing this until your site is online. And while best practices exist, you will only know if your guesses were right once everything is already out there.
Luckily, there is a way of tracking your visitors’ every move and look over their shoulder while they browse around your site. We are, of course, talking about web analytics, the most popular of which is Google Analytics.No wonder. The platform is free, powerful and can be used by anyone.
For that reason, in this tutorial we will not only talk about why installing web analytics on your site is a good idea but also show you how to install Google Analytics in WordPress in several ways.
Strap in and let’s get tracking.
Why Install Google Analytics?
As mentioned, Google Analytics takes the guesswork out of running your website. Instead of theorizing about who your visitors are and what they want and need, analytics can provide you with definitive data on these topics.
Among other things, Google Analytics can tell you the following:
- Which countries your visitors are coming from
- The devices they use to access your site (desktop, mobile)
- How long they stay on your site and the information they are interested in
- At what time they come by (so you can time your publishing schedule accordingly)
- Which sites are sending visitors to you
- The keywords that bring them to your site
Pretty useful, huh? And that’s far from everything. Thus, by installing Google Analytics on your WordPress site, you can get to know the people visiting it better than yourself and now you will learn how to do it.
How to Install Google Analytics Manually
First, let’s look at how to install Google Analytics by hand. Further below, you will also learn to do the same thing via plugin.
Create a Google Analytics Account
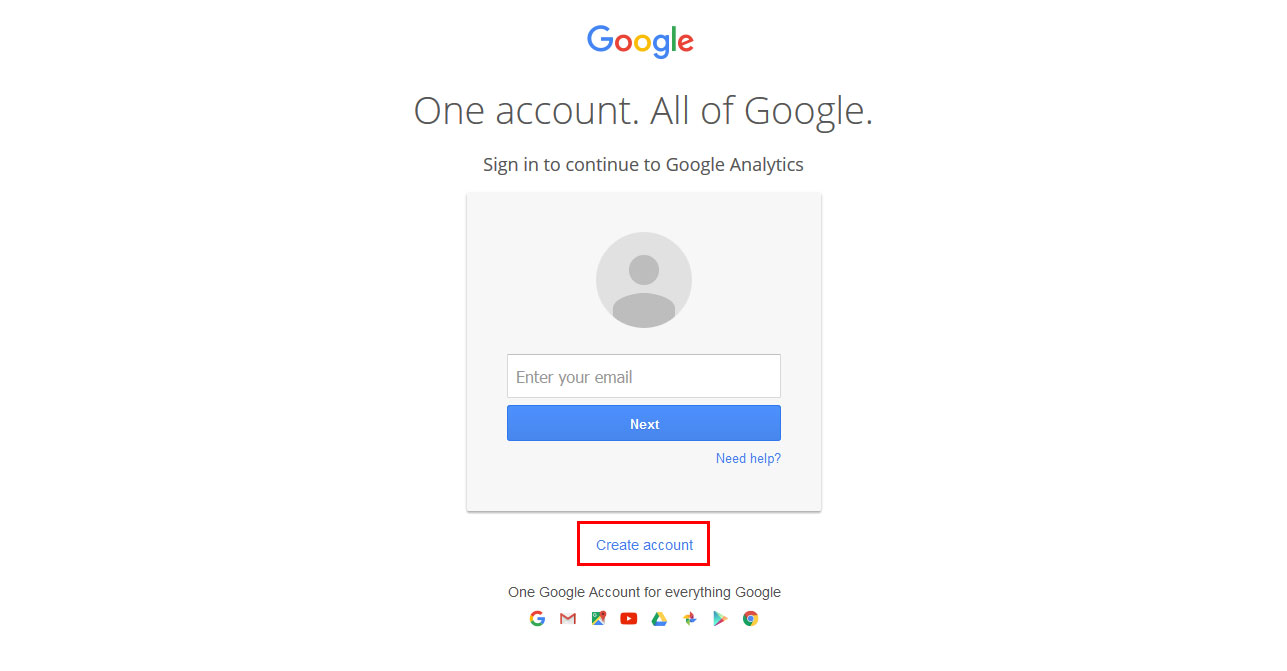
As a very first step, you need to create a Google Analytics account. If you create a Google account before (such as for your email), you are already halfway there. Everyone else will need to set one up first.
To do so, first head on over to the Google Analytics page. Here, hit Create Account at the top. In the next screen, click again on Create Account.
This will take you to the following screen:
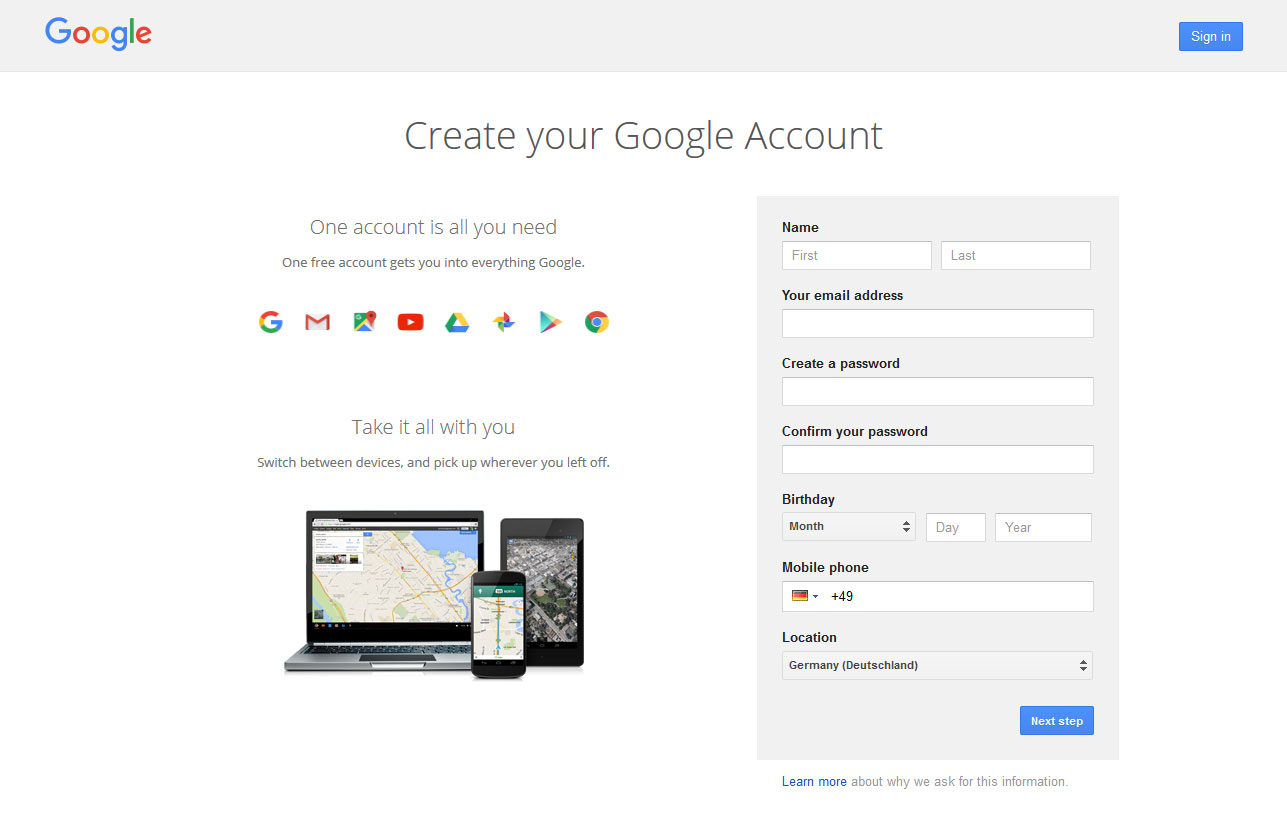
One there, input the information asked from you. Make sure to provide a valid email address as it will be used to verify your new account. When you are done hit Next Step. You will then be asked to click on the verification link in the email Google sent you.
After you have done so, it’s time to return to the Analytics home page, only this time, click Sign in. Click the Sign up button on the right and you are ready to add your first website.
Add Your Site
Next up, you will have to input information about the site you want to track.
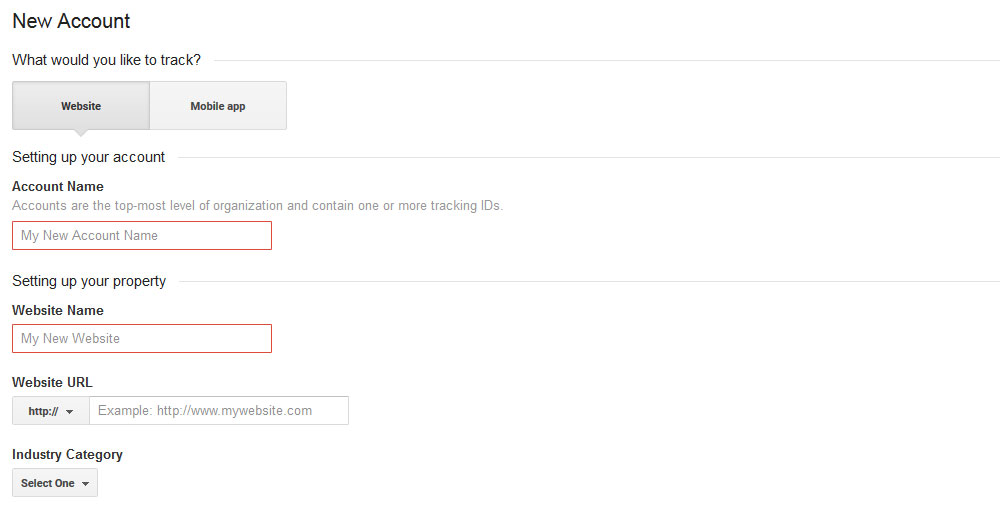
Naturally, the choice for the first option is Website.
After that, it’s time to create an account name. An account is an entity which can contain one or several websites. Therefore, it makes sense to give it a name topical name such as business websites or similar.
Then it’s time to set up the property, i.e. your website. First, type in a name. This will usually the name of your domain. Then, provide the web address of your site.
After that, you can pick from a number of industry categories. Select the one that fits your site best. Then, after setting up the correct time zone, we can move on to the Data Sharing Settings.
In this area you can determine how much data access you want to give Google and their employees in order to improve their services. The choice is up to you.
When you are done with the configuration it’s time to click Get Tracking ID. This might result in being asked to agree to Google’s terms and conditions before you will land on a page like this:
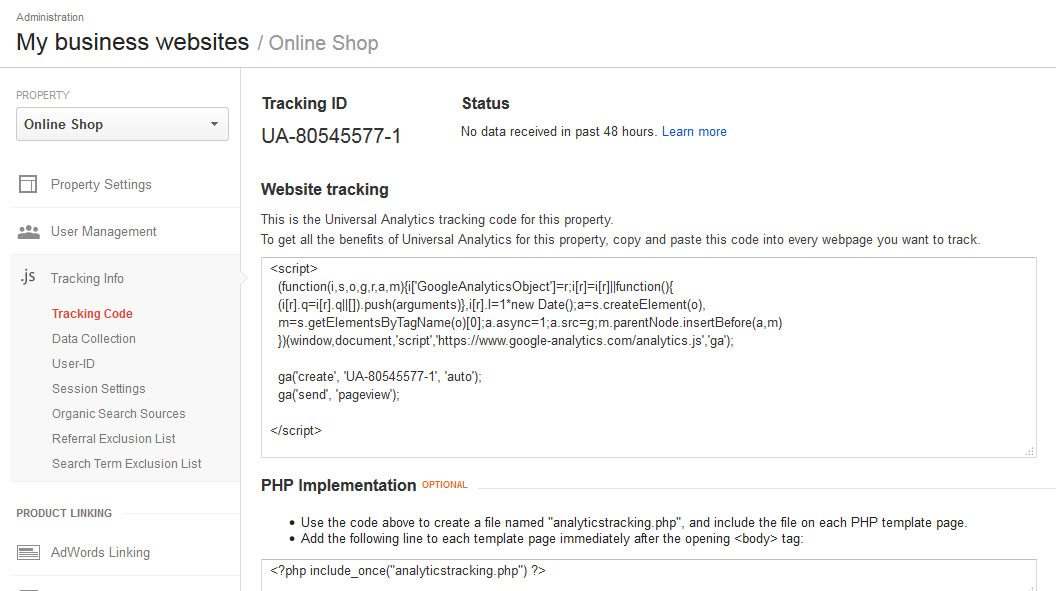
As you can see, it contains both your tracking ID and some code to use it on your website. Leave this page open, we will need it in the next step.
Add the Tracking ID to Your Site
The code you find on the page needs to be put into the head section of all pages on your website you want Google to track.
If you decided to do this manually, you have two different choices: either paste the code directly in your header.php or add it to your site via functions.php
For the first part, open your header.php file with any text editor and paste the code (including the opening and closing <script> tags) right after the <body> tag
In functions.php you can achieve the same objective with this function
<?php

add_action('wp_footer', 'add_googleanalytics');

function add_googleanalytics() { ?>

// Paste your Google Analytics code from the previous step here

<?php } ?>
Please be aware that you really need to know what you are doing. Messing with functions.php can break your site if you don’t.
However, that’s it. Now the code is present on your site and Google should start tracking your visitors. Please note that it might take up to 24 hours before you will see any data in your Google Analytics dashboard.
Adding Google Analytics to WordPress With a Plugin
Using a plugin to install Google Analytics in WordPress is much easier and involves fewer steps. That’s why many people prefer to go this route.
Be aware that even if you use a plugin to install Google Analytics in WordPress, you always need to set up an account with Google first. Therefore, if you haven’t done so yet, now is the time.
Install the Plugin
The most comfortable way to install Google Analytics in WordPress is to use the plugin Google Analytics by MonsterInsights (formerly known as Google Analytics by Yoast)
To do so, you first need to install it on your site.
For that, log in to your site and go to Plugins > Add New. Type in the name of the plugin and hit enter. Find it in the list and click Install Now.
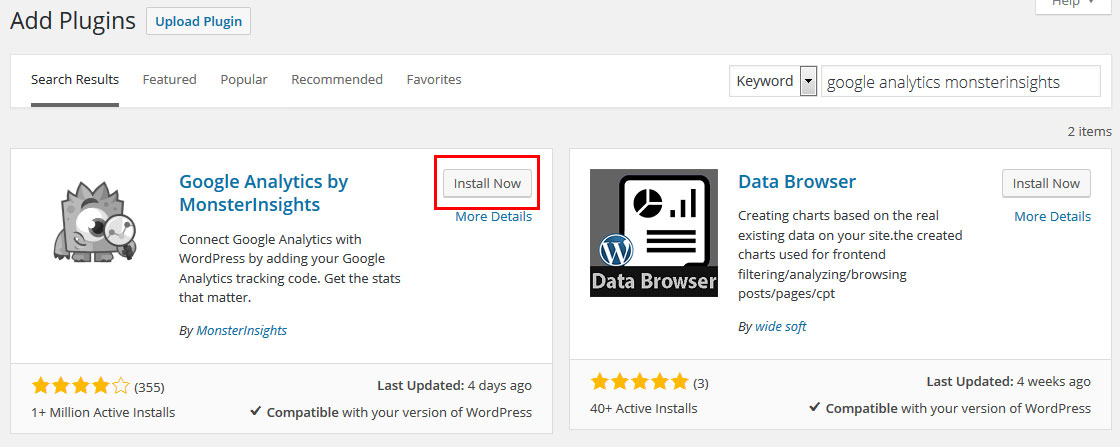
Don’t forget to activate after it’s done!
Connect to Google Analytics
Once that’s over, there will be a new icon called Insights in WordPress main menu. Hover over it and click on settings.
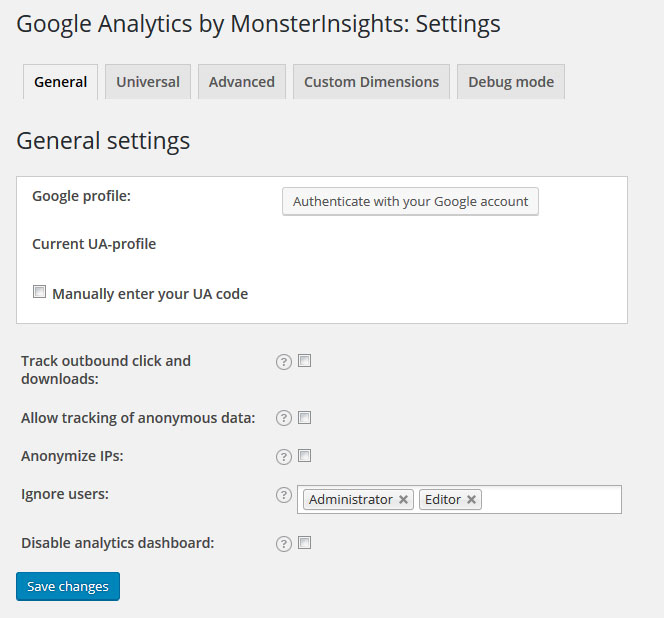
In this menu you will find a link that says Authenticate with your Google account. Click it.
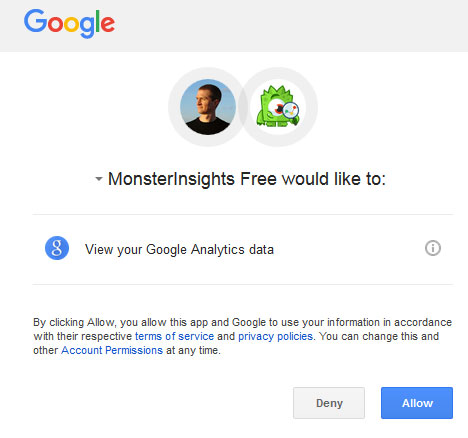
MonsterInsights will then automatically try to connect with Google to get the necessary tracking code.
Input your credentials if you are not already logged in and allow the plugin to access your analytics data.
This will give you a line of code which you will be asked to copy and paste into the highlighted field inside the plugin settings.
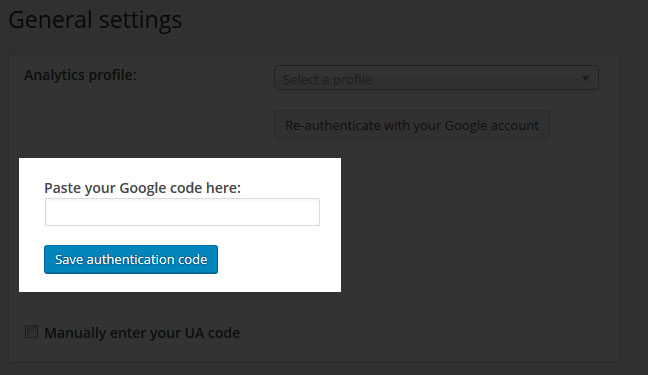
Do so and hit Save authentication code.
Now all that’s left to do is pick the right property (aka website) from the drop-down list, save changes and you are done. Easy, wasn’t it? We think so, too!
Additional Plugin Settings
The neat thing about this plugin is that it can not just connect your site to Google Analytics but also imports data from the dashboard into the WordPress backend. Under Insights > Dashboard, you can see an overview and reports of your most important website data without logging into Google Analytics. Saves time and effort. For the beginning it will be empty but just give it time and you will start seeing some results.
Additional Google Analytics WordPress plugin options
The plugin above is far from the only option to bring the power of Google Analytics to your WordPress website. There are a few more viable options in the WordPress directory.
Google Analytics WD

Google Analytics WD is the most functional WordPress analytics plugin that you can go with. It’s the official certified member of Google Analytics Technology Partners Program, and offers the most advanced tracking, data filtering and reporting functionalities. It provides data reports for your website audience, and enables you to get custom reports based on any metric and dimension. The plugin lets you track custom dimensions to get data for logged in users, post authors, post types and categories, etc. It comes with the goal management functionality and allows you to track targeted activities with pre defined conditions.
Though feature loaded, Google Analytics WD is yet easy to use and manage. It comes with colorful pie charts for reports and is easy to setup and configure. ”
Google Analytics Dashboard for WP

Another solution for connecting WordPress to Google Analytics and importing your tracking data into the dashboard (in real time nonetheless!)
The plugin also offers in-depth reports and you can customize the tracking code via hooks, setting options and much more.
Google Analyticator

Install Google Analytics on your site without editing any template files! Comes with several widgets to display your data in the admin area and on the frontend. Plus, many more features.
Conclusion
Web analytics are an important tool to understand your visitors and their behavior. Their data can tell you exactly how many people visit your site, where they are coming and what they are up to. Google Analytics is one of the most popular solutions out there due to its capabilities and the fact that it is free. It’s a great all round solution for any website owner.
Above, you have learned how to install Google Analytics in WordPress in several ways – manually and via plugin – so you, too, can take advantage of its awesome powers.
With the collected data you are able to make your site even more attractive and functional for your visitors and provide even more value to them. And that’s what it’s all about, isn’t it?
Do you use Google Analytics? How did you choose to connect it to your site? Any additional tips or thoughts? Let us know in the comment section below!


Hi Nick.
Good work in explaining each steps. It’s handy tutorials for beginners.
Thank you for this post, it helped me choose the best method to add Google Analytics to my website. Adding Google Analytics to WordPress With a Plugin Option seems most ideal, but I am curious about the disadvantages? They contradict the advantages for theme changes and updates.